The topic we are going to cover in this post involves how to determine the thickness of a blank, unstayed dished head, with pressure on the concave side, and a segment of a sphere. We will review the formula, provide where to find it, define each of the variables, and then provide a couple examples illustrating key concepts. This will provide you with a better understanding of how to successfully determine the minimum required thickness of a blank, unstayed dished head.
All referenced page numbers are from the 2007 ASME Boiler & Pressure Vessel Code
Formula
Information regarding how to determine the minimum required thickness of a dished head is contained in PG-29 page 12 and the formula used for the calculation is within PG-29.1, page 12 which is as follows;
Minimum Thickness Formula:
![]()
Maximum Allowable Working Pressure Formula:
The minimum required thickness formula above can be transposed to determine the maximum allowable working pressure of flat unstayed circular heads, covers, and blind flanges.
The above formula is not provided in the 2007 ASME Boiler & Pressure Vessel Code
Formula Variables
The formula variables for blank unstayed dished heads are explained on page 12 and page 13
t = minimum thickness of head
P = maximum allowable working pressure (hydrostatic head loading need not be included)
L = radius to which the head is dished, measured on the concave side of the head
S = Maximum allowable working stress using values given in (Section II, Part D, Table 1A. See PG-27.4, note 2) page 11. It is important when determining the maximum allowable stress value to check (PG-6 plate materials) page 4 and (PG-9 boiler tube materials) page 5 before starting calculations as this information will determine the correct stress table to use by indicating whether the material is carbon steel or an alloy steel.
w = weld joint reduction factor per PG-26 page 9
Important Dished Head Code Requirements
When calculating the minimum thickness required for a blank unstayed dished head I recommend you familiarize yourself with the code requirements from paragraph PG-29.1 page 12 to PG-29.9 page 14 but I have listed the ones below I have found to be of greatest importance.
PG-29.2 page 13 which states. “The radius to which a head is dished shall be not greater than the outside diameter of flanged portion of the head. Where two radii are used the longer shall be taken as the value of L in the equation.”
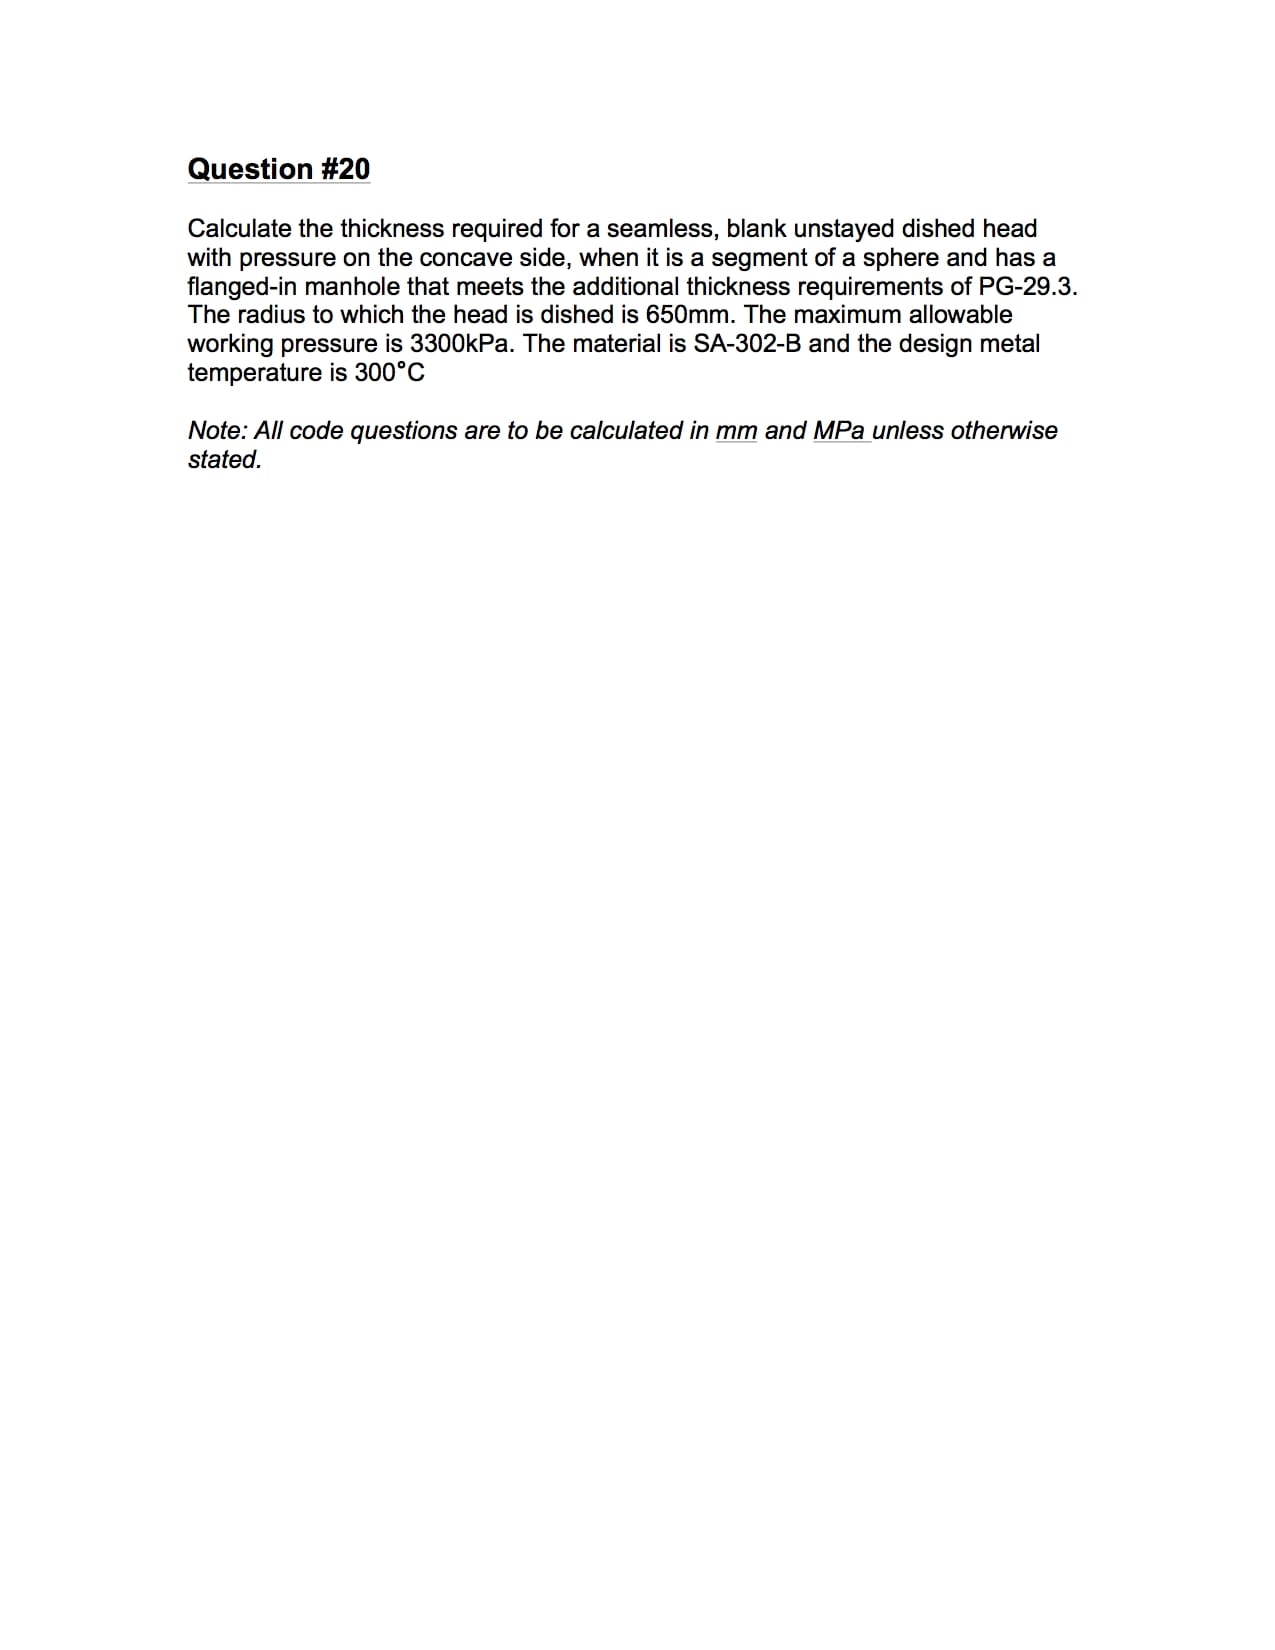
PG-29.3 page 13 which states. “When a head dished to a segment of a sphere has a flanged-in manhole or access opening that exceeds 6 in. (150mm) in any dimension, the thickness shall be increased by not less than 15% of the required thickness for a blank head computed by the above formula, but in no case less than 1/8 in. (3mm) additional thickness over a blank head. Where such a dished head has a flanged opening supported by an attached flue, an increase in thickness over that for a blank head is not required. If more than one manhole is inserted in a head, the thickness of which is calculated by this rule, the minimum distance between the openings shall be not less than one-fourth of the outside diameter of the head.”
PG-29.5 page 13 which states. “Where the radius L to which the head is dished is less than 80% of the diameter of the shell, the thickness of a head with a flanged-in manhole opening shall be at least that found by making L equal to 80% of the diameter of the shell and with the added thickness for the manhole. The thickness shall be the minimum thickness of a head with a flanged-in manhole opening for any form of head and the maximum allowable working stress shall not exceed the values given in Table 1A of Section II, Part D.”
PG-29.6 page 13 which states. “No head, except a full-hemispherical head, shall be of a lesser thickness than that required for a seamless shell of the same diameter.”
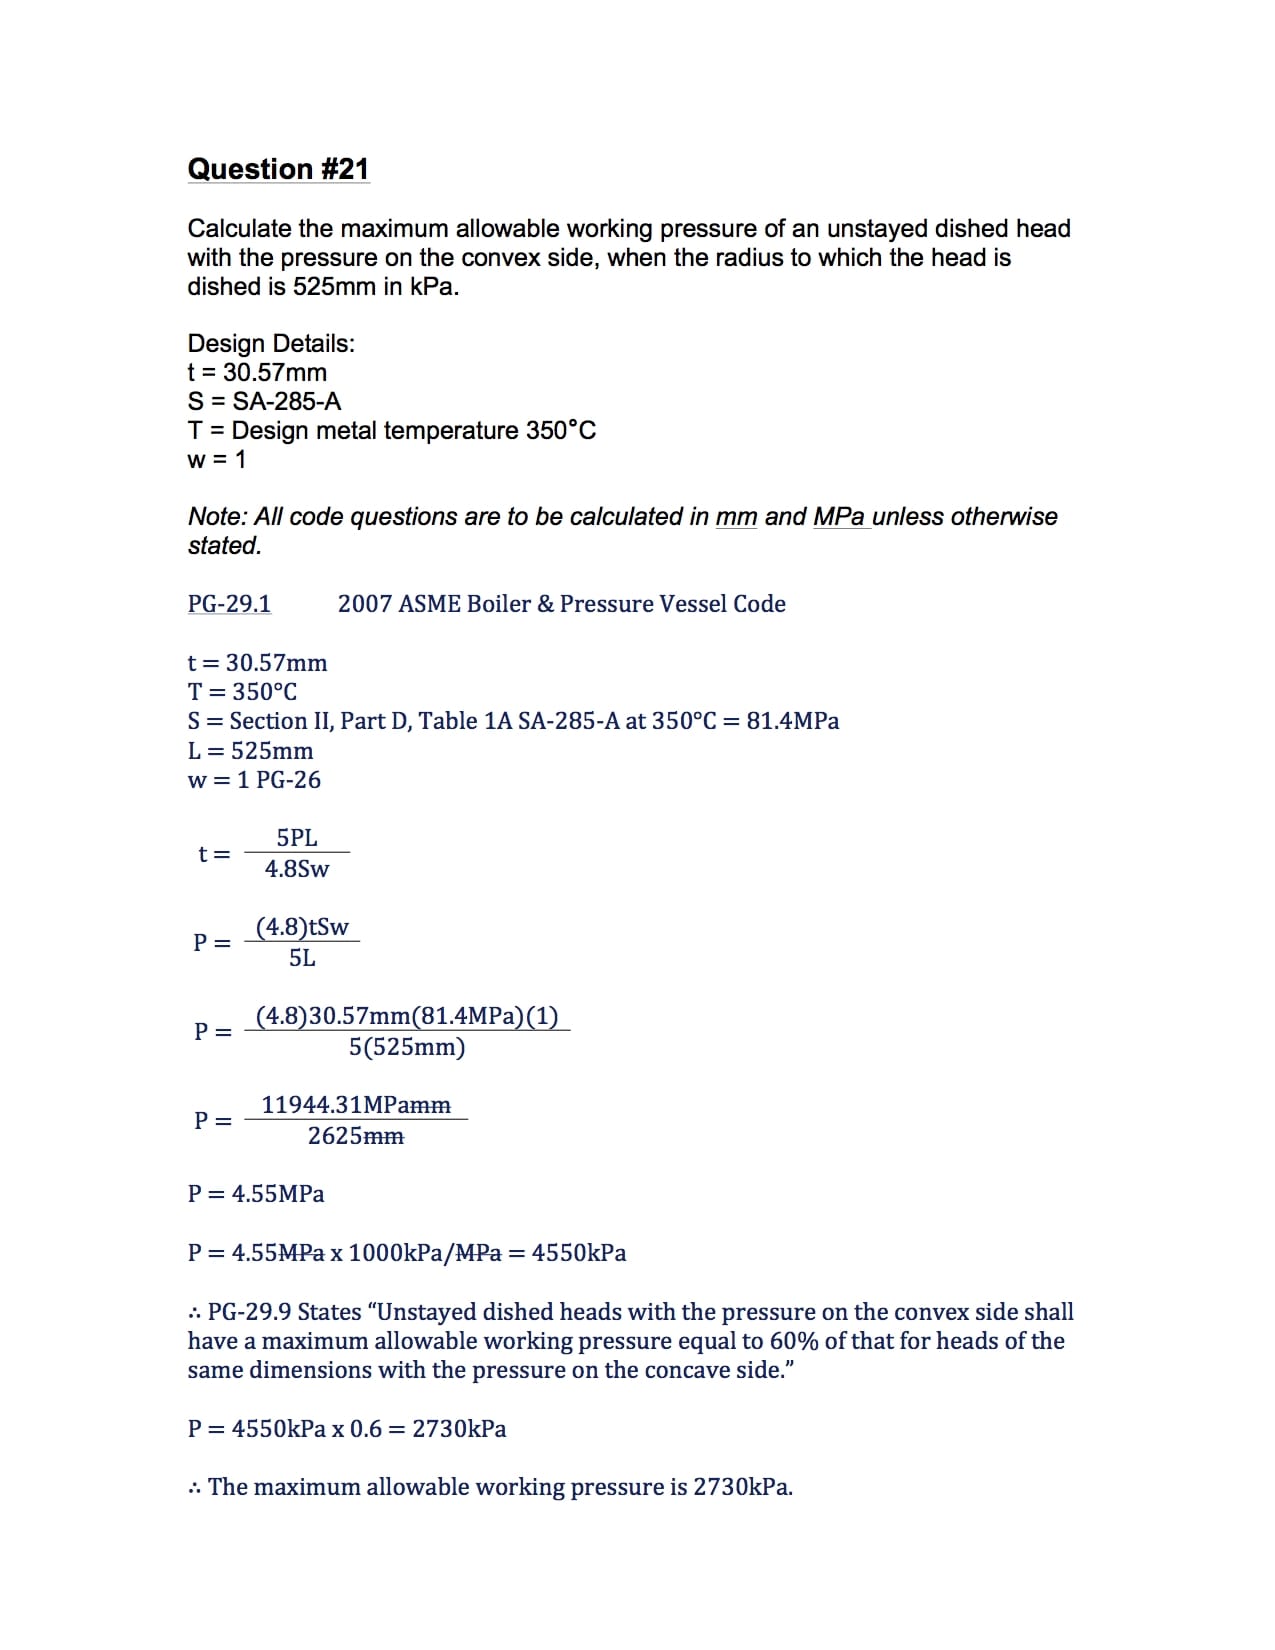
Pg-29.9 page 14 which states. “Unstayed dished heads with the pressure on the convex side shall have a maximum allowable working pressure equal to 60% of that for heads of the same dimensions with the pressure on the concave side.”
[table id=1 /]
How To: Determine The Thickness Of A Blank, Unstayed Dished Head Questions
Note: All code questions are to be calculated in (mm) and (MPa) unless otherwise stated. Convert accordingly and properly before the calculation.
Question #18
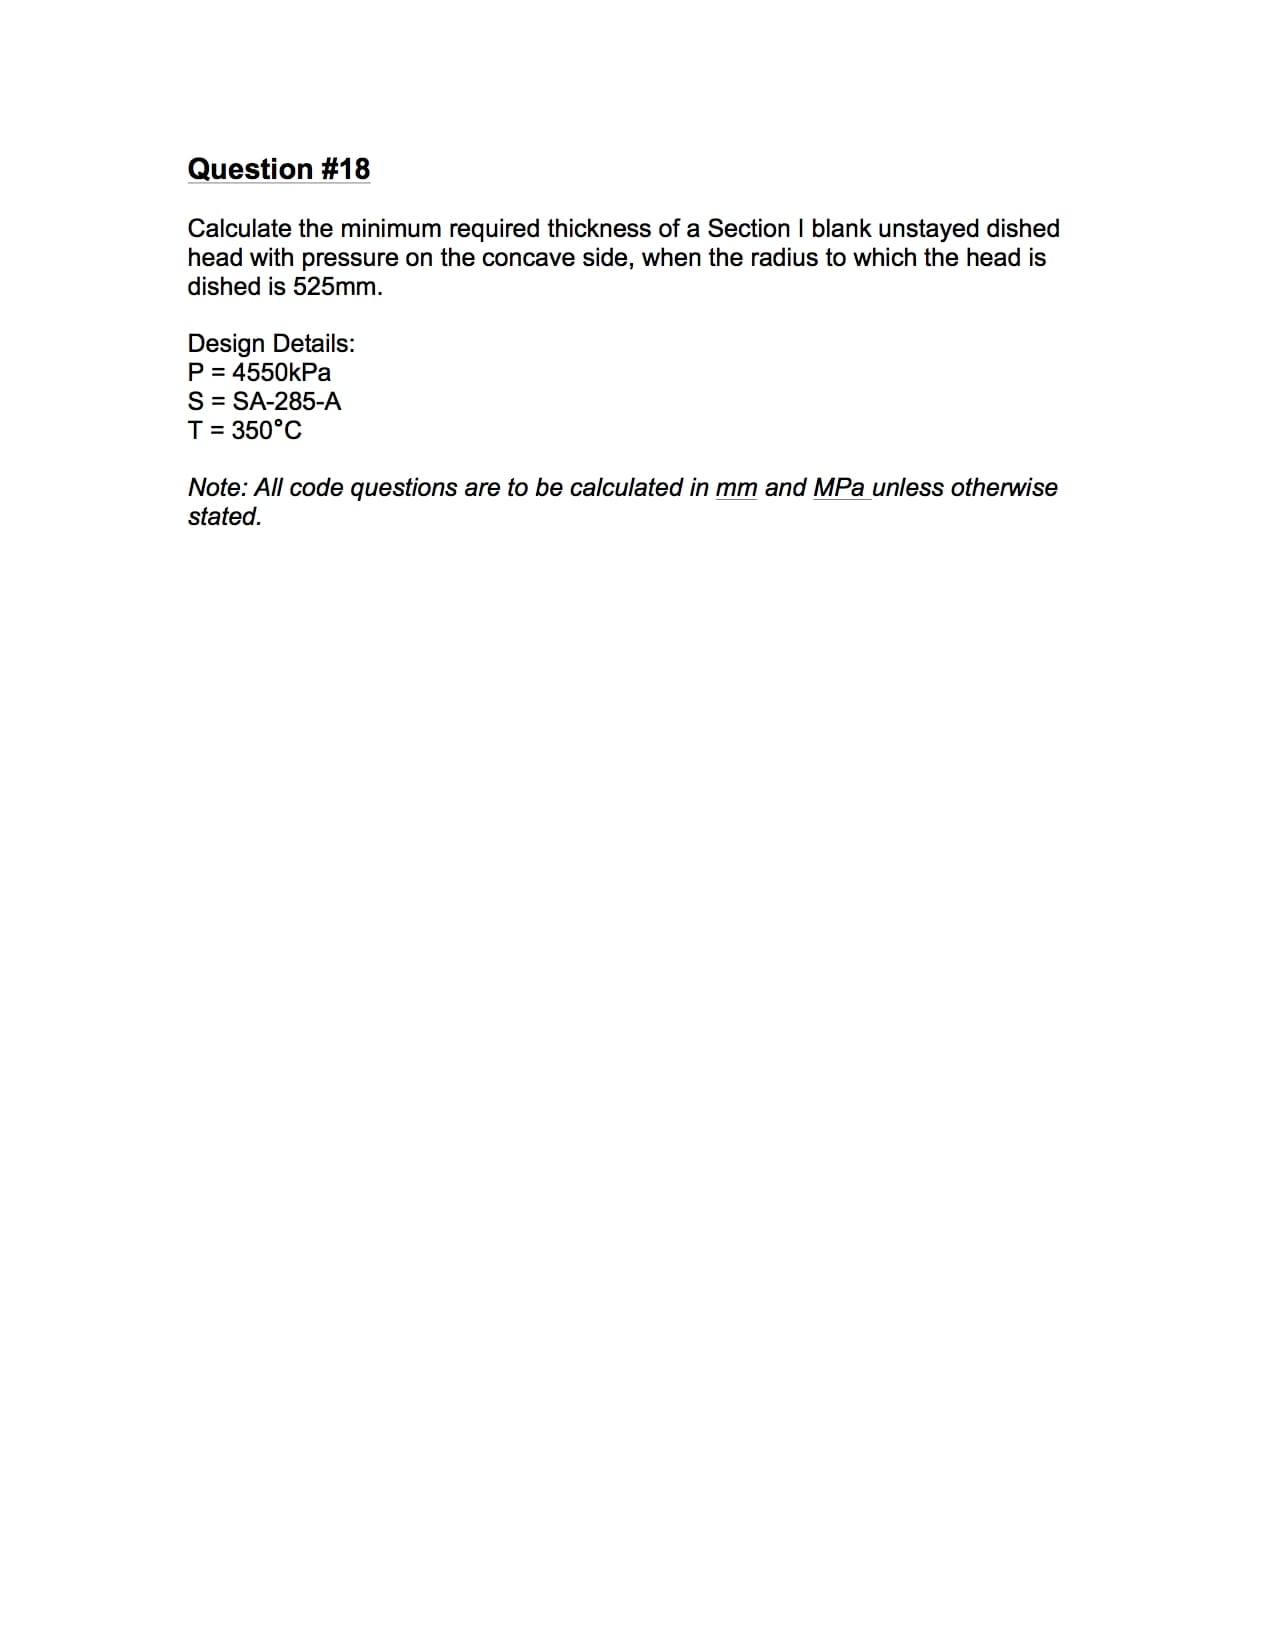
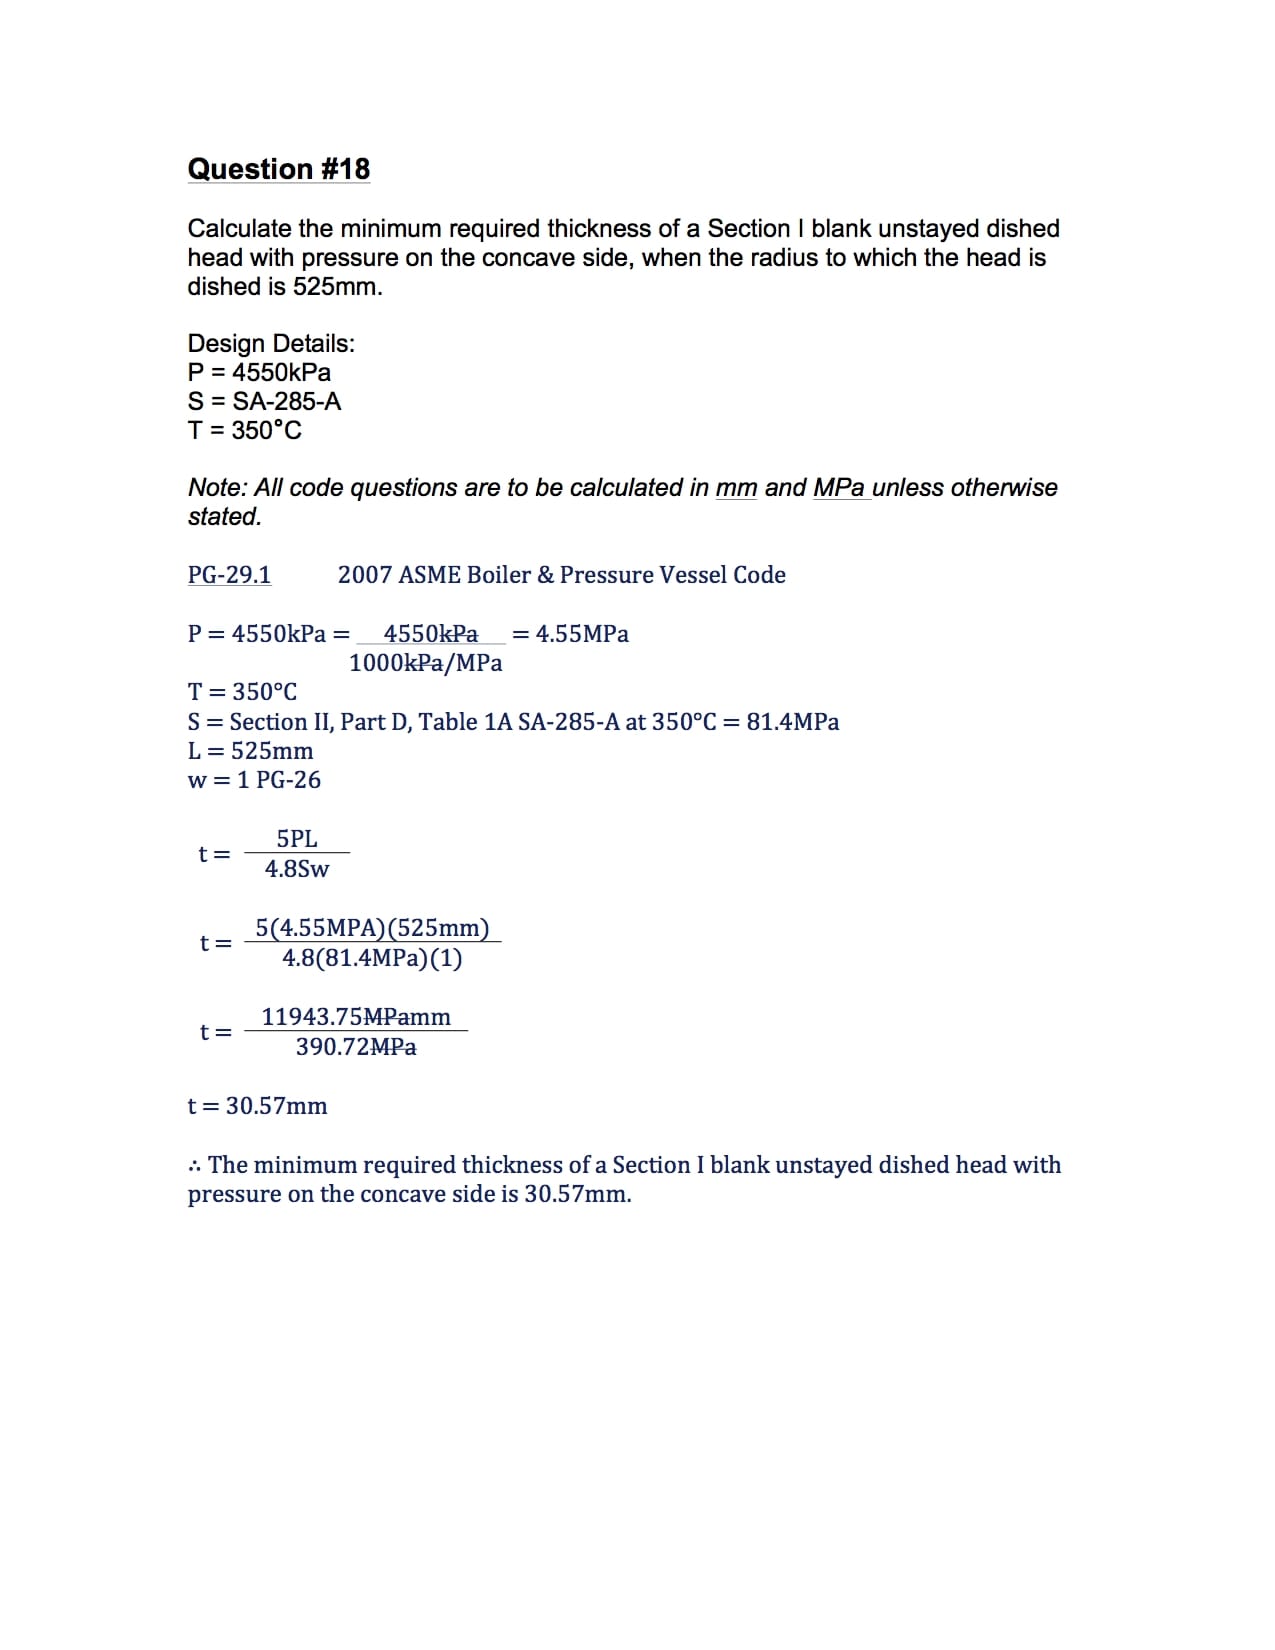
Question #19
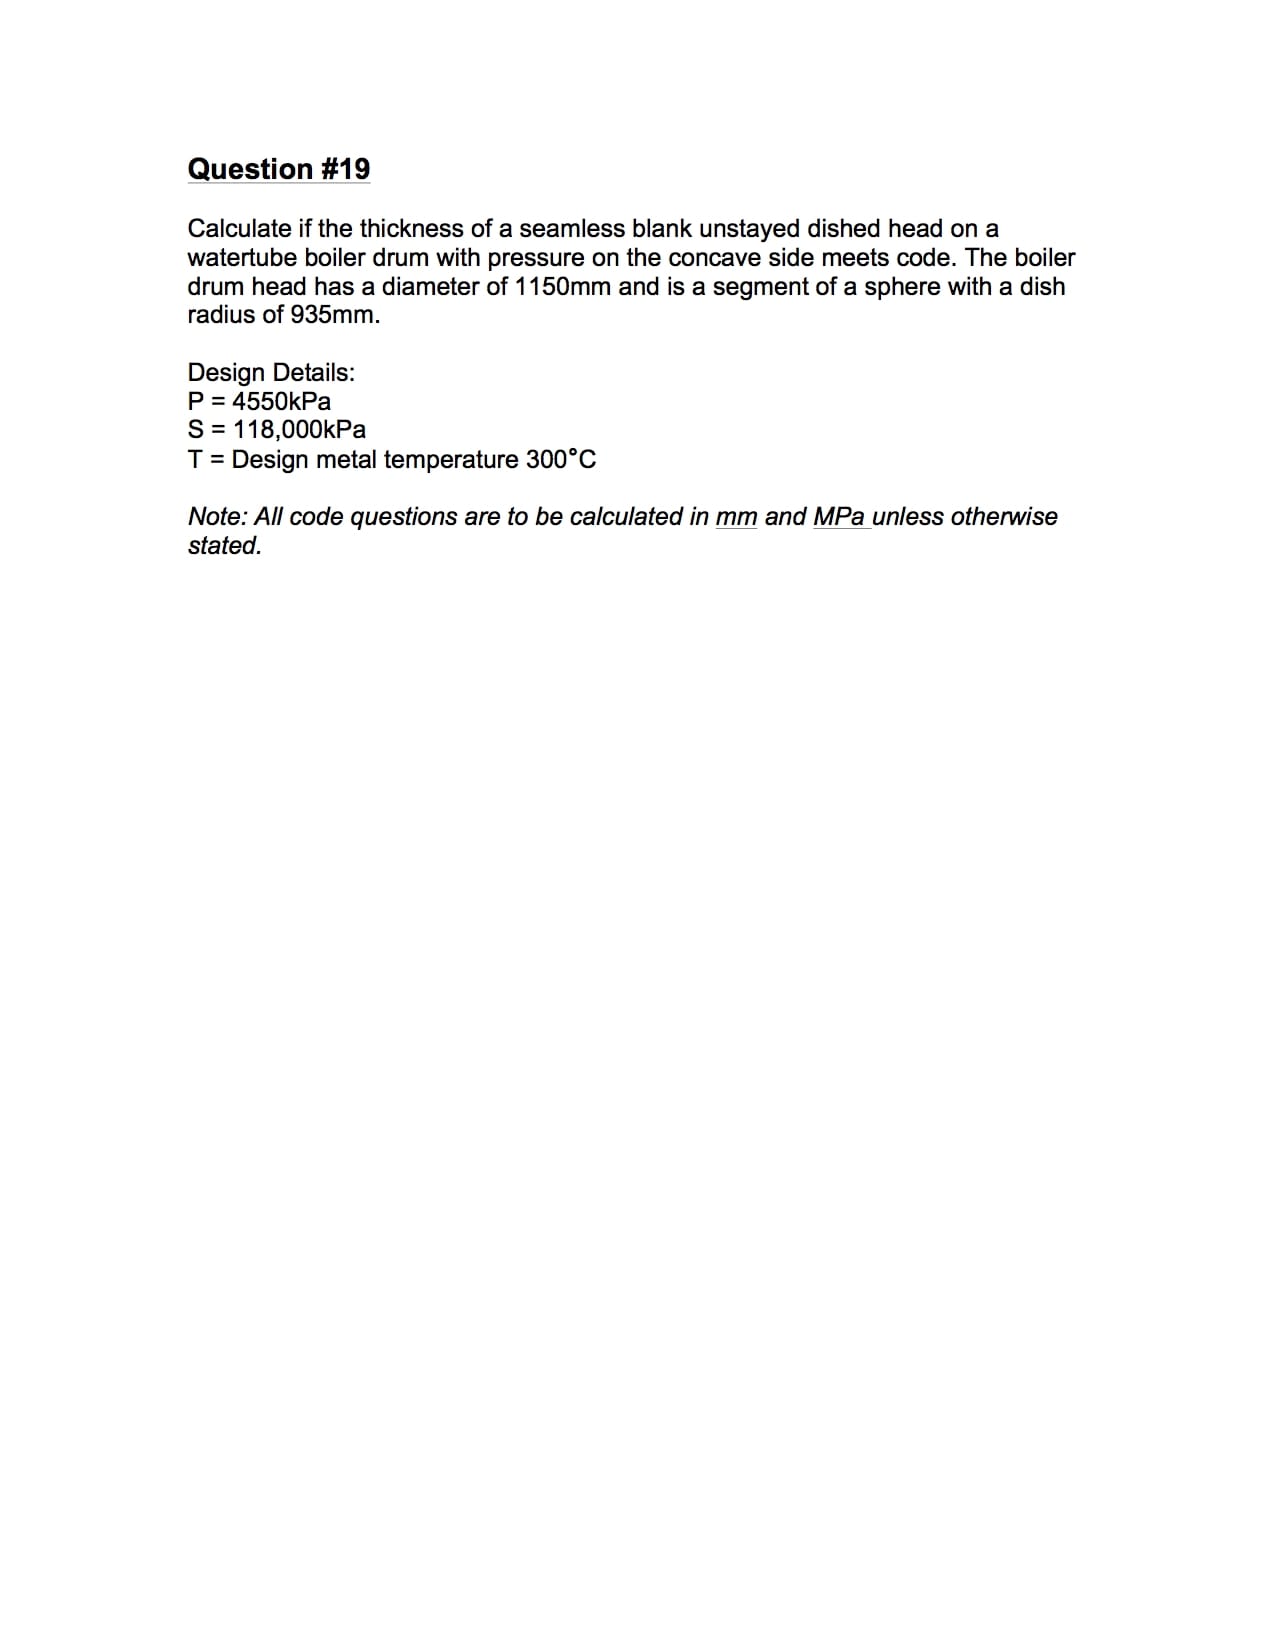
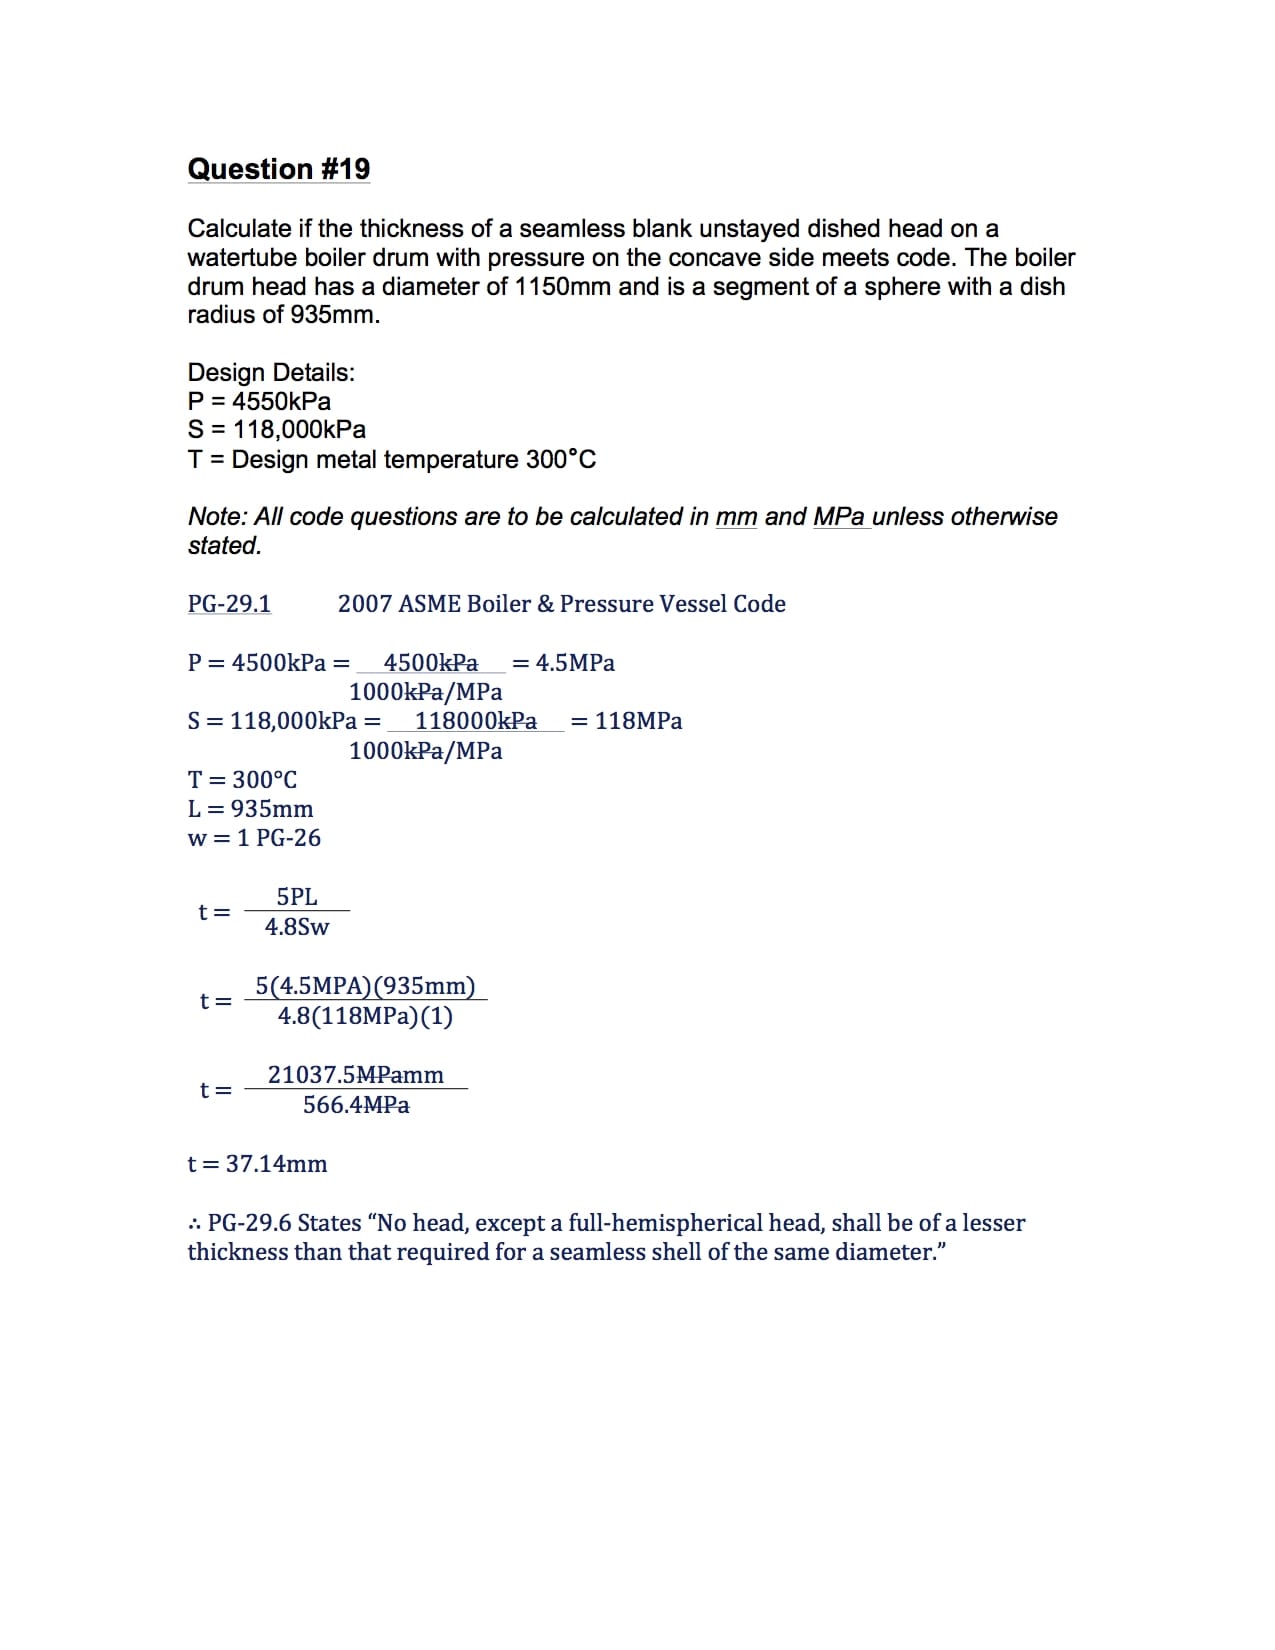
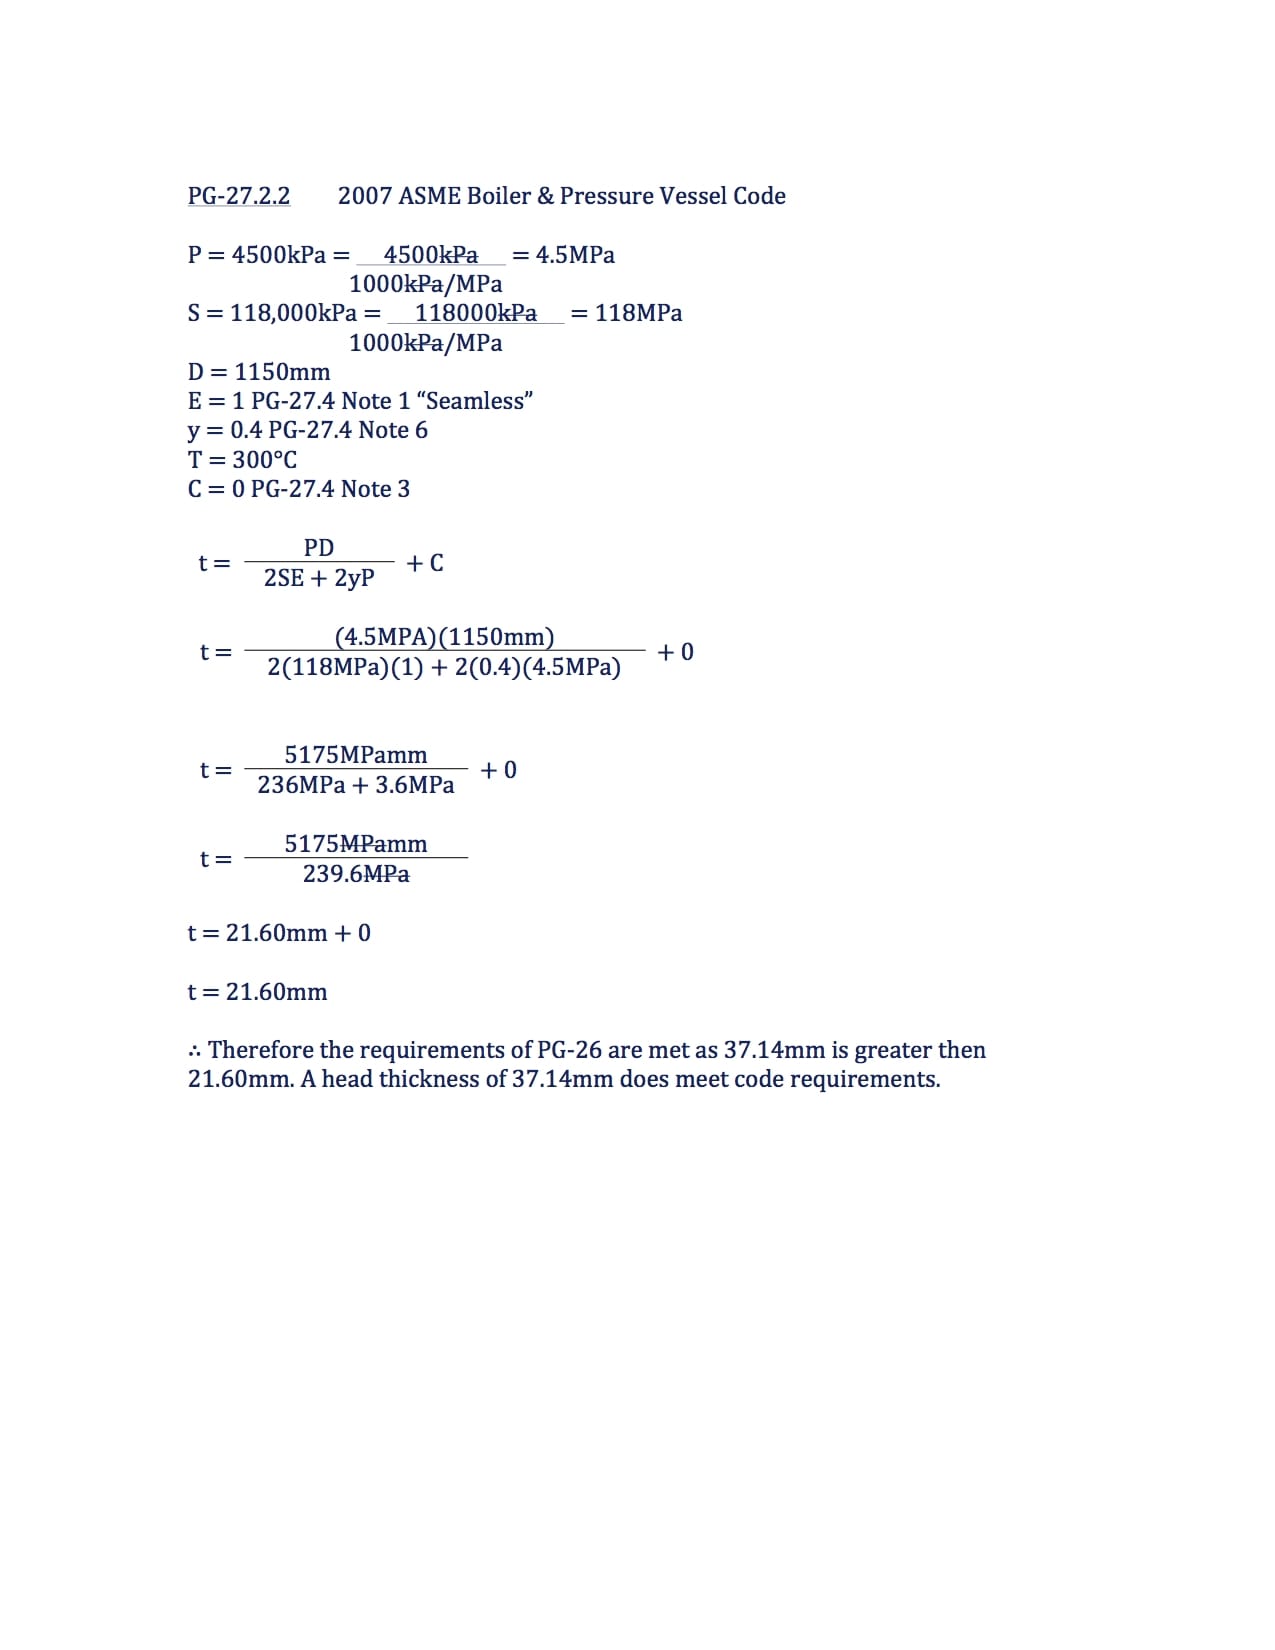
Question #20
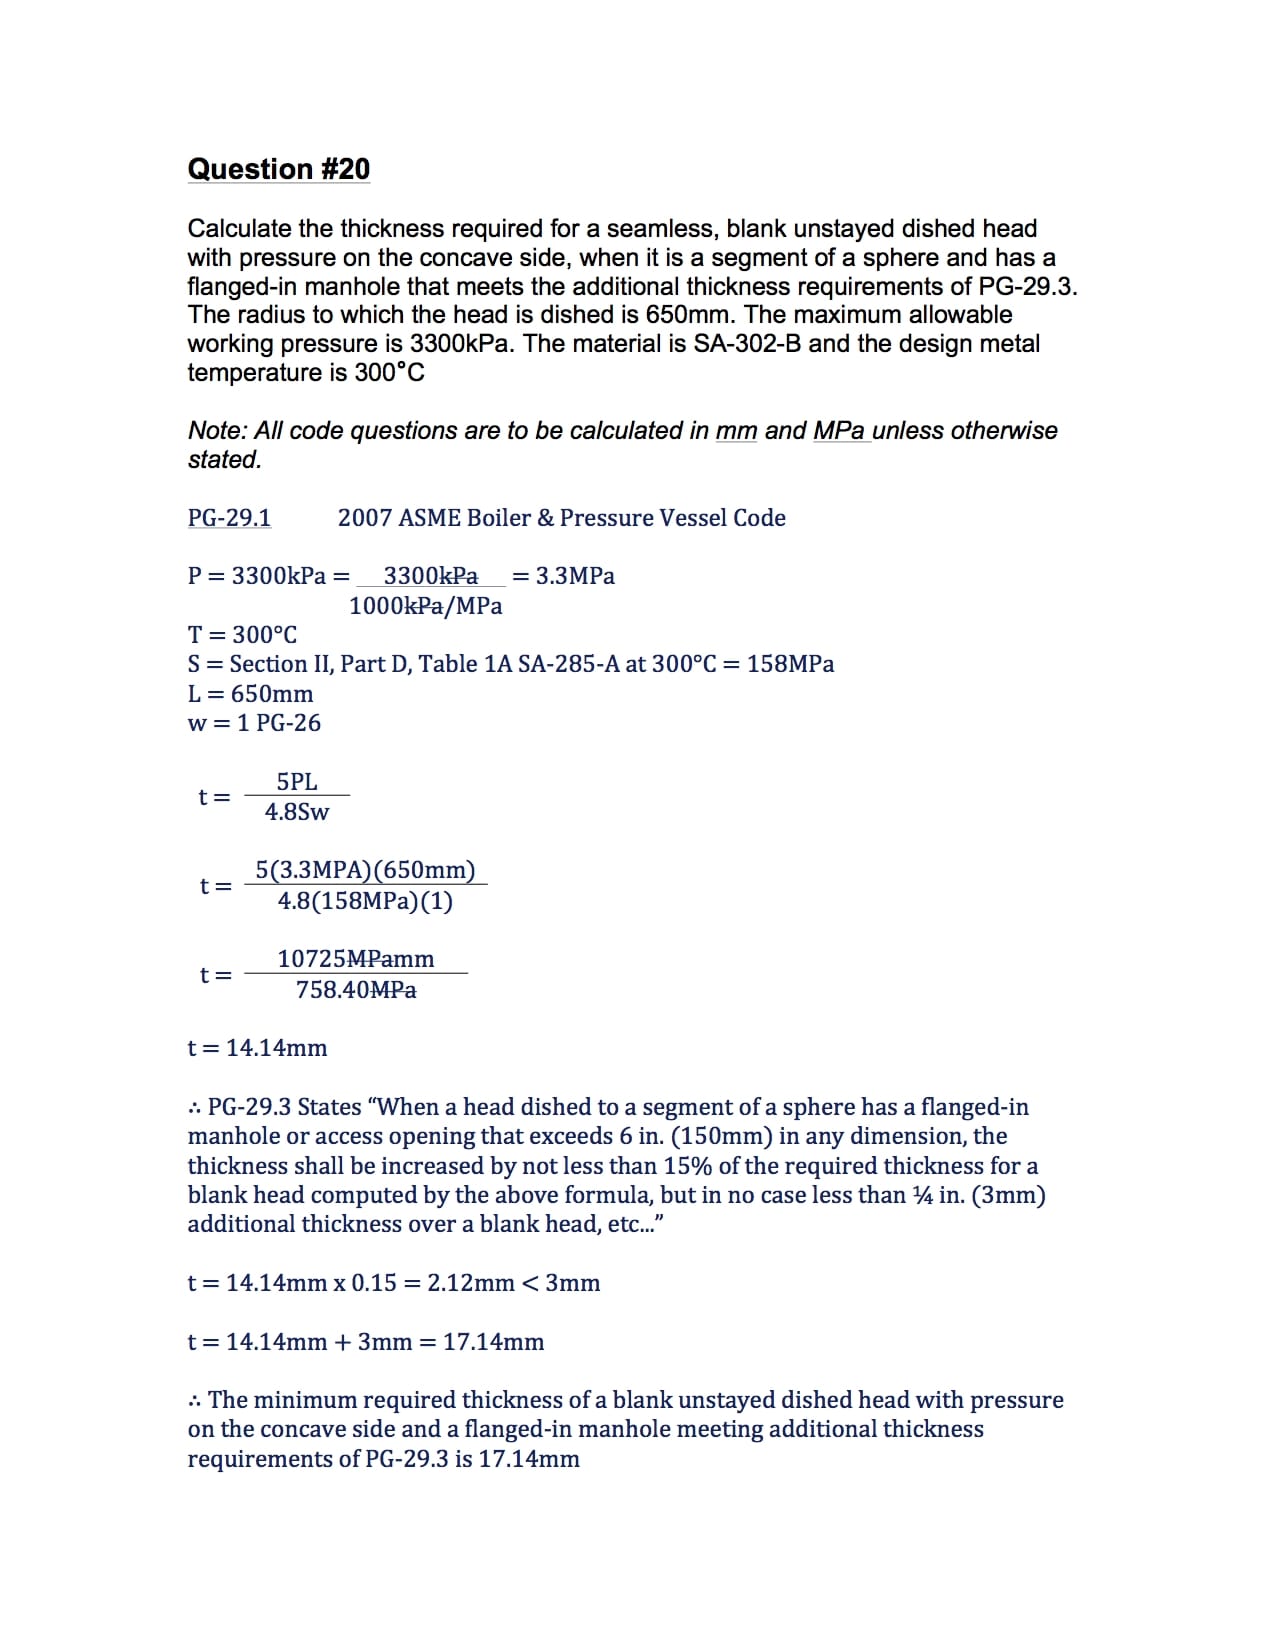
Question #21
Determine The Thickness Of A Blank, Unstayed Dished Head Summary
I’m always looking to improve the quality of the content on the site with the main goal being to help you achieve success throughout your Power Engineering career. The only way I can do that, is to hear from you what you like, what you didn’t like, and any ideas for improvement. Let me know through the contact form or in the comment section below what you thought about how to Determine The Thickness Of A Blank, Unstayed Dished Head post.
Please share, like or tweet us below if you know of any other Power Engineers working on 2A1 or learning how to determine the thickness of a blank, unstayed dished head.
Thanks everyone,
Power Engineering 101

